


# UICollectionView的使用
在之前的文章已经讲到如何使用 UITableView 实现列表;现在我们一起看一下,如何通过 UICollectionView 实现网格式布局和瀑布式布局
UICollectionView 和 UITableView 大致是类似的,只是内部变成了多行。内部很多方法和 UITableView 都是类似的。
# 一、 UICollectionView 的基础知识
# 1. UICollectionView 组成
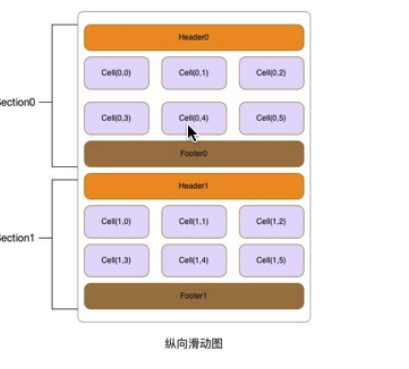
与 UITableView 相似, 在 UICollection View 时,也要遵循数据源(UlCollectionViewDataSource)与代理协议方法(UICollectionViewDelegate),与 UITableView 不同的是, 我们还需要为 UICollectionView 创建一个布局参数,也就是 UICollectionViewLayout,这也是 UICollectionView 的精髓所在,正是通过它,我们才实现了 UICollectionView 各式各样的布局
系统为我们提供了两个 UICollectionView 的布局类:
UICollectionViewLayout和UICollectionViewFlowLayout,UICollectionViewLayout类是一个抽象类,我们在自定义布局的时候可以继承此类,并在此基础上设置布局信息,UICollectionViewFlowLayout继承于UICollectionViewLayout,是系统为我们写好的布局类,该类为我们提供了一个简单的布局样式,假如我们只需要一个特别简单的网格布局或者流水布局,可以直接使用它。
# 二、 UICollectionView 使用
# 1. UICollectionViewFlowLayout 实现网格布局
布局 UICollectionViewFlowLayout 常用的属性:
itemSize:如果 cell 的大小是固定的,应该直接设置此属性,就不用实现代理minimumLineSpacing:行之间的最小间距minimumInteritemSpacing:最小 cell 之间的间距sectionInset:组内边距,设置的是 UICollectionView 整体的组内边距UICollectionViewScrollDirectionscrollDirection: 设置 UICollectionView 的滚动放向headerReferenceSize: header 参考大小footerReferenceSize: footer 参考大小sectionInset: section 的 inset,用于设置与上、左、底、右的间隔sectionHeadersPinToVisibleBounds: 顶部是否悬停sectionFootersPinToVisibleBounds: 底部是否悬停
以上都是通过 UICollectionViewFlowLayout 来设置全局的布局,如果需要设置单独的每个 item 的属性则需要继承 UICollectionViewLayout 或者使用 UICollectionViewDelegateFlowLayout 来设置
如下将使用 MVC 的方式编写,如有疑问请查看 UITableView 的使用
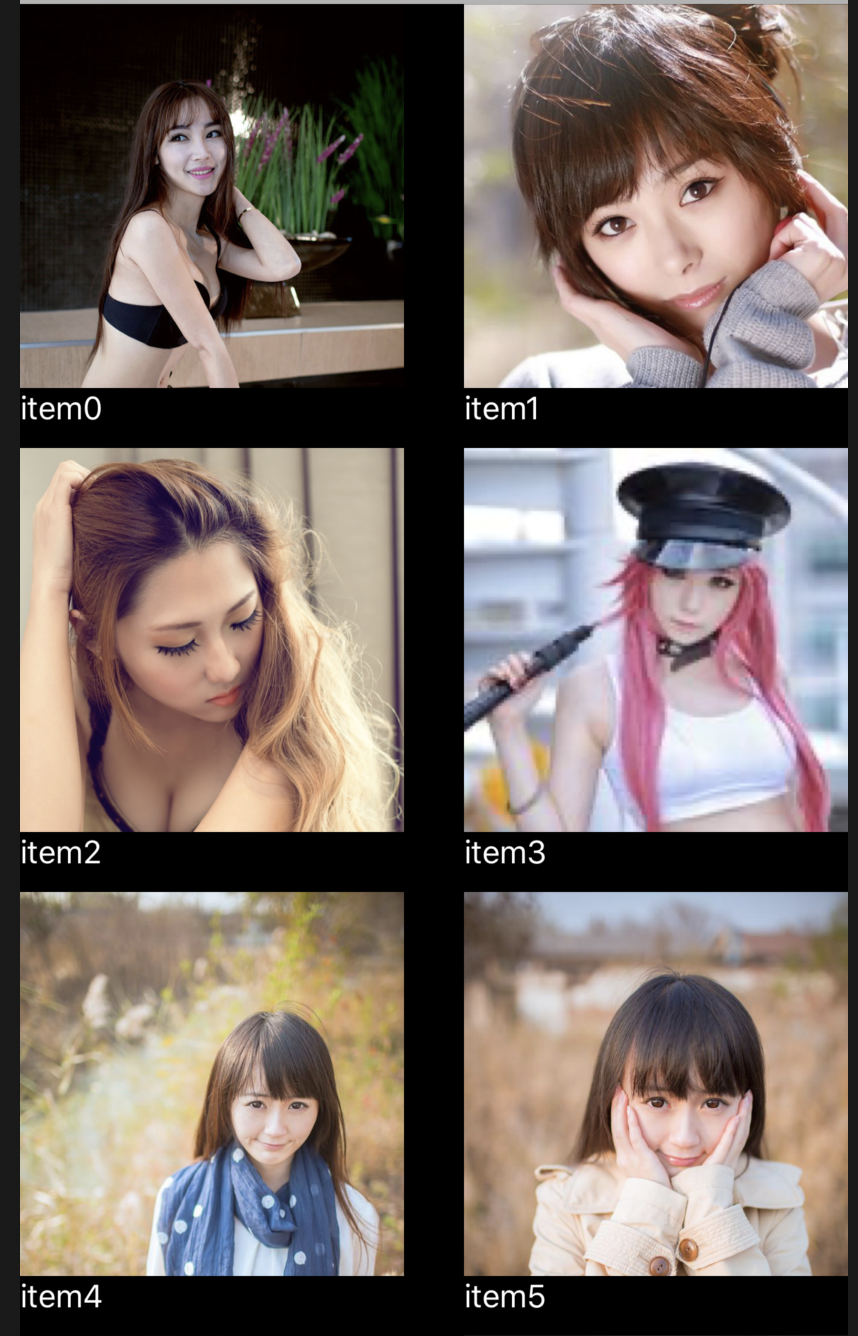
我们的目标是展示网格式布局,且每一个 Cell 展示一个图片和文字描述。
# (1) Model 定义
//
//  HYBGridModel.h

#import <Foundation/Foundation.h>
#import <UIKit/UIKit.h>

@interface HYBGridModel : NSObject

@property (nonatomic, copy) NSString *imageName;
@property (nonatomic, copy) NSString *title;

@end
//
//  HYBGridModel.m
#import "HYBGridModel.h"

@implementation HYBGridModel

@end
# (2) 每一个 Cell 的展现
//
//  HYBGridCell.h

#import <UIKit/UIKit.h>

@class HYBGridModel;

@interface HYBGridCell : UICollectionViewCell
// 给cell设置Model数据
- (void)configCellWithModel:(HYBGridModel *)model;

@end
每一个 Cell 具体的实现:
//
//  HYBGridCell.m

#import "HYBGridCell.h"
#import "HYBGridModel.h"

@interface HYBGridCell ()
// 有一个标题
@property (nonatomic, strong) UILabel *titleLabel;
// 一张图片
@property (nonatomic, strong) UIImageView *imageView;

@end

@implementation HYBGridCell
// 初始化的Cell的时候同步初始化图片和文字
- (instancetype)initWithFrame:(CGRect)frame {
  if (self = [super initWithFrame:frame]) {
    self.imageView = [[UIImageView alloc] init];
    self.imageView.frame = CGRectMake(0, 0, self.frame.size.width, self.frame.size.width);
    [self.contentView addSubview:self.imageView];

    self.titleLabel = [[UILabel alloc] init];
    self.titleLabel.frame = CGRectMake(0, self.frame.size.height - 20, self.frame.size.width, 20);
    self.titleLabel.numberOfLines = 0;
    self.titleLabel.font = [UIFont systemFontOfSize:16];
    self.titleLabel.textColor = [UIColor whiteColor];
    self.titleLabel.backgroundColor = [UIColor blackColor];
    self.titleLabel.layer.masksToBounds = YES;
    [self.contentView addSubview:self.titleLabel];
  }

  return self;
}
// 给Cell设置模型数据
- (void)configCellWithModel:(HYBGridModel *)model {
  dispatch_async(dispatch_get_global_queue(0, 0), ^{
      // 获取到对应的图片
    UIImage *image = [UIImage imageNamed:model.imageName];
    // 图片剪裁
    image = [self clipImage:image toSize:self.imageView.frame.size];
    dispatch_async(dispatch_get_main_queue(), ^{
//      model.clipedImage = image;
      self.imageView.image= image;
    });
  });

  self.titleLabel.text = model.title;
}

// 图片的剪裁
- (UIImage *)clipImage:(UIImage *)image toSize:(CGSize)size {
  UIGraphicsBeginImageContextWithOptions(size, YES, [UIScreen mainScreen].scale);

  CGSize imgSize = image.size;
  CGFloat x = MAX(size.width / imgSize.width, size.height / imgSize.height);
  CGSize resultSize = CGSizeMake(x * imgSize.width, x * imgSize.height);

  [image drawInRect:CGRectMake(0, 0, resultSize.width, resultSize.height)];

  UIImage *finalImage = UIGraphicsGetImageFromCurrentImageContext();
  UIGraphicsEndImageContext();

  return finalImage;
}

@end
# (3)编写 ViewController
其大致的步骤和 UITableView 是类似的;
- 初始化
UICollectionView并将其添加到视图中 - 设置数据源和代理方法
- 给
UICollectionView设置布局并调整布局参数 - 编写代理方法,设置网格有多少个分组,一个分组有多少个数据
- 实现每一个 Cell,并注入 Model 数据
//
//  HYBGridViewController.m

#import "HYBGridViewController.h"
#import "HYBGridCell.h"
#import "HYBGridModel.h"
// 定义屏幕的宽度
#define kScreenWidth ([UIScreen mainScreen].bounds.size.width)
// 设置要复用的Identifier
static NSString *cellIdentifier = @"gridcellidentifier";

@interface HYBGridViewController () <UICollectionViewDataSource, UICollectionViewDelegate>

@property (nonatomic, strong) UICollectionView *collectionView;
@property (nonatomic, strong) NSMutableArray *datasource;// 数据源

@end

@implementation HYBGridViewController

- (void)viewDidLoad {
    [super viewDidLoad];
    //  初始化Flowu布局
    UICollectionViewFlowLayout *layout = [[UICollectionViewFlowLayout alloc] init];
    // 设置每一个的宽度为(kScreenWidth - 30) / 2,
    layout.itemSize = CGSizeMake((kScreenWidth - 30) / 2, (kScreenWidth - 30) / 2 + 20);
    //    s设置最小行间距
    layout.minimumLineSpacing = 10;
    //    设置每一个cell的间距
    layout.minimumInteritemSpacing = 10;
    //    用于设置与上、左、底、右的间隔
    layout.sectionInset=UIEdgeInsetsMake(0, 5, 0, 5);

    //    初始化UICollectionView
    self.collectionView = [[UICollectionView alloc] initWithFrame:self.view.bounds
                                             collectionViewLayout:layout];
    //    给当前视图使用代码的方式添加UICollectionView
    [self.view addSubview:self.collectionView];
    //    给UICollectionView注册Cell
    [self.collectionView registerClass:[HYBGridCell class]
            forCellWithReuseIdentifier:cellIdentifier];
    //    设置代理方法和数据源
    self.collectionView.delegate = self;
    self.collectionView.backgroundColor = [UIColor greenColor];
    self.collectionView.dataSource = self;

    //    mock数据和图片
    int j = 0;
    for (NSUInteger i = 0; i < 60; ++i) {
        if (++j > 12) {
            j = 1;
        }
        HYBGridModel *model = [[HYBGridModel alloc] init];
        model.imageName = [NSString stringWithFormat:@"img%d.jpg", j];
        model.title = [NSString stringWithFormat:@"item%ld", i];
        [self.datasource addObject:model];
    }

    //    记得刷新表格哦
    [self.collectionView reloadData];
}

- (NSMutableArray *)datasource {
    //    懒加载数据
    if (_datasource == nil) {
        _datasource = [[NSMutableArray alloc] init];
    }

    return _datasource;
}
// 每一行具体展示的内容
#pragma mark - UICollectionViewDataSource & UICollectionViewDelegate
- (UICollectionViewCell *)collectionView:(UICollectionView *)collectionView
                  cellForItemAtIndexPath:(NSIndexPath *)indexPath {
    HYBGridCell *cell = [collectionView dequeueReusableCellWithReuseIdentifier:cellIdentifier
                                                                  forIndexPath:indexPath];
    HYBGridModel *model = self.datasource[indexPath.item];
    [cell configCellWithModel:model];

    return cell;
}
// 一个分组下面有多少个数据
- (NSInteger)collectionView:(UICollectionView *)collectionView numberOfItemsInSection:(NSInteger)section {
    return self.datasource.count;
}
// 默认只有一个分组
- (NSInteger)numberOfSectionsInCollectionView:(UICollectionView *)collectionView{
    return 1;
}

@end
参考
- 本文链接: https://mrgaogang.github.io/ios/grid/UICollectionView%E7%9A%84%E4%BD%BF%E7%94%A8.html
- 版权声明: 本博客所有文章除特别声明外,均采用 CC BY-SA 4.0 许可协议。转载请注明出处!